The Snipping Tool, as you can see in Figure 1,
is for capturing images of your desktop. Don’t underestimate the
utility of a screen-capture program. If you ever have an IT guy say he
can’t help you
because he has never seen the error message, use the Snipping Tool to
show him your evidence. Granted, you can’t always do this because your
entire computer might be frozen, but it will come in handy.
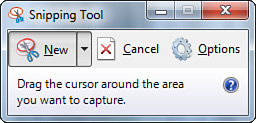
You start the Snipping Tool
by going to Start, Snipping Tool (or by choosing Start, All Programs,
Accessories, Snipping Tool). You select the type of “snip” you want by
clicking the down arrow next to the New button. Your options are
Free-form Snip—
Enables you to literally draw around something as if you were cutting
it out with scissors. The results will still be rectangular in form,
though.
Rectangular Snip—
Enables you to drag out a rectangular-shaped area to the size you want.
Think of it as precropping an image. Otherwise, you’d have to capture
the entire screen and then cut out what you want. This option eliminates
the extra steps.
Windows Snip—
Enables you to click on a particular window to capture only that
window, automatically cutting out the desktop image and anything else,
even underlying windows.
Full-screen Snip— Enables you to capture the whole screen in one go.
Once captured, you can draw
on or highlight sections of your images and then save them. Click the
disk image in the toolbar to open the Save dialog box (or click File,
Save). The default location is your Pictures library . You can save your images in the following file formats:
PNG—
The Portable Network Graphics file format is the newest and most
accessible file format today. It was developed to replace the GIF file
format, which, at the time, was owned by CompuServe. PNGs are generally
larger but they can also store more complex amounts of data.
GIF—
The classic GIF file format is a very simple file format designed to
make images as small as they possibly can be for quicker transfer over
the network.
JPG—
Also known as JPEG, this file format was designed by the Joint
Photographic Experts Group to offer photojournalists a file format that
could retain a lot of data but could also be compressed for network
deliveries to newspapers around the world. JPG offers a lot of options,
including continuously variable compression.
MHT—
A Single File HTML format, which is proprietary to Microsoft and really
has little use, especially as a file format for screen captures. I’d
avoid this unless your intent is to confuse individuals attempting to
view images on your computer.
Viewing Your “Snipped” Images
Windows 7 offers a number of ways to view, organize, and work with your images.
There are two ways to quickly work with the images you have created
using the Snipping Tool—Windows Photo Viewer, and Paint, the Windows
classic, which has been updated significantly for the first time since
the release of Windows 95 (see Figure 2).
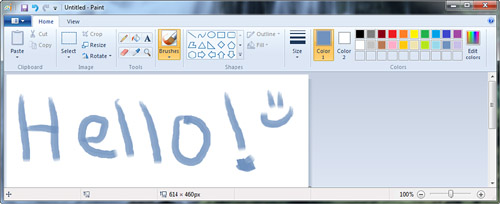
Aside
from receiving a ribbon user interface somewhat like the toolbar system
introduced in Microsoft Office 2007, Paint now sports a wide range of
rather useful features and supports a number of file formats, including
PNG, GIF, and JPG. Other
formats supported by Paint are
BMP— The classic Microsoft Bitmap file format (with either the .bmp extension or the rarely used .dib extension) is available in monochrome, 4-, 8-, and 24-bit color formats.
TIFF—
This format, created by Aldus (those people who made PageMaker), is
quite capable of storing a wide range of detailed image data. This makes
it well suited for storing fax information, which is why Aldus created
it, back when every fax machine maker had its own format. Its extensions
are .tif and .tiff.
The new Paint offers you a load of new features with which you can further edit and manipulate your screen captures.